Crafts
Papercraft Owls
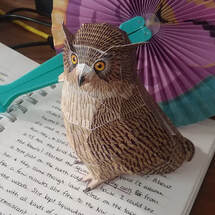
Canon's Creative Park has some great owl papercrafts available. Papercraft is an activity where you print out different pieces (remember to reuse paper!), cut them out and glue them together to create a 3-D object or animal. As of November 2021, Canon has 10 owls available for free. All you need to do is create a free Canon account (or log in with Google).
Canon's Creative Park has some great owl papercrafts available. Papercraft is an activity where you print out different pieces (remember to reuse paper!), cut them out and glue them together to create a 3-D object or animal. As of November 2021, Canon has 10 owls available for free. All you need to do is create a free Canon account (or log in with Google).
Blakiston's Fish Owl
Snowy Owl female
Snowy Owl male 1
Snowy Owl male 2
Barn Owl
Tropical Screech-Owl
Mini Barn and Tropical Screech-Owls
Simple Halloween owl
Graduation owls
Snowy Owl female
Snowy Owl male 1
Snowy Owl male 2
Barn Owl
Tropical Screech-Owl
Mini Barn and Tropical Screech-Owls
Simple Halloween owl
Graduation owls
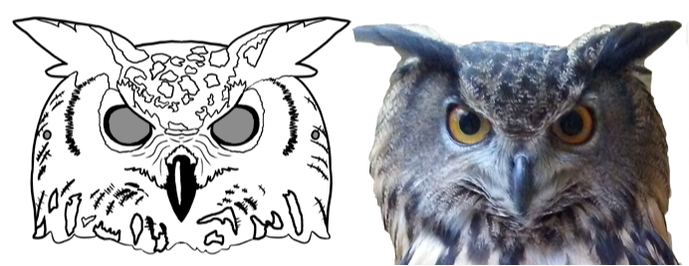
Uhu Mask
Click the image below to open the design so you can print it.
Print the mask (preferably on reused paper), then color it as our Eurasian Eagle Owl, Uhu, or you can make it as colorful as you'd like! Then, cut out the mask, including the areas in gray for the eyes and string holes. Use string or ribbon to tie the mask to your face, and you can spend the day as an owl!
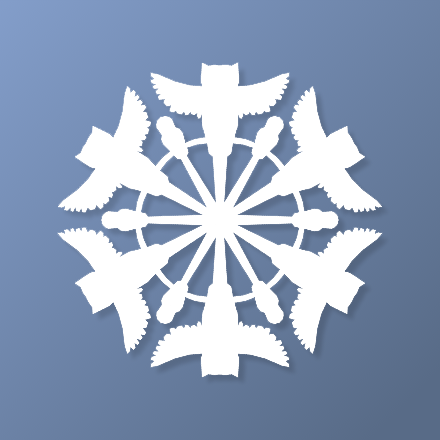
Snowflake Owls
Click each image to open the design so you can print it.
Print the design on thinner paper if possible. Once printed, fold in the left half under the right half on the line, keeping the owl on top. Then fold the bottom half up under the top half on the line, keeping the owl on top. Fold the rest of the circle into thirds using the two remaining lines, keeping the owl on top. Cut out the owl, discarding the gray portion. Carefully unfold your owl snowflake.
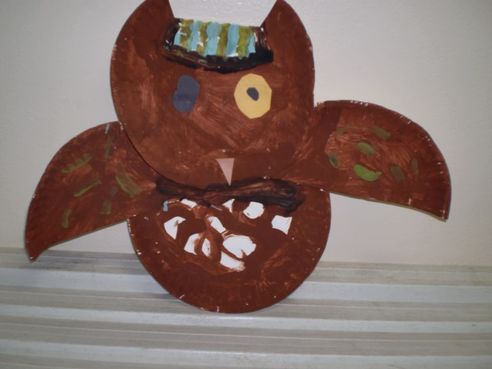
Rusty the Paper Plate Owl
Rusty the Great Horned Owl was hit by a car. His right eye was injured and later had to be removed. He lives in a big pen with his mate, Iris. View the live video feed of Rusty.
MATERIALS:
Glue 2 plates together to create a head and a body.
Cut the 3rd plate in half.
Glue the plate halves to the sides of the body to create a perching owl or sticking out for a flying owl.
Mark the center of the paper plate that is the head. Make a cut 2 inches to the left of the center mark and 2 inches to the right of the center. Fold this flap forward and glue.
Paint the plates as in the picture of Rusty.
Great horned owls have yellow eyes. Use the googly eye or paint Rusty’s left eye. Be sure to paint eye yellow with a black center.
Use these ideas to make your own parliament (group) of owls!
MATERIALS:
- Three 12” paper plates
- Scissors
- Glue (liquid or permanent stick)
- Craft paint in tones of brown, rust, black, yellow or your choice
- Paint brushes
- Googly eye (optional)
Glue 2 plates together to create a head and a body.
Cut the 3rd plate in half.
Glue the plate halves to the sides of the body to create a perching owl or sticking out for a flying owl.
Mark the center of the paper plate that is the head. Make a cut 2 inches to the left of the center mark and 2 inches to the right of the center. Fold this flap forward and glue.
Paint the plates as in the picture of Rusty.
Great horned owls have yellow eyes. Use the googly eye or paint Rusty’s left eye. Be sure to paint eye yellow with a black center.
Use these ideas to make your own parliament (group) of owls!
Pandora, Patrick, & Patience - The original triplet owls
(Craft based on the book "Owl Babies" by Martin Waddel)
(Craft based on the book "Owl Babies" by Martin Waddel)
Watch the video of one of the owlets' first teenager hoots.
Read the book Owl Babies and substitute the triplet owlet names for the owl names in the story.
Optional: substitute the names of children you know
MATERIALS:
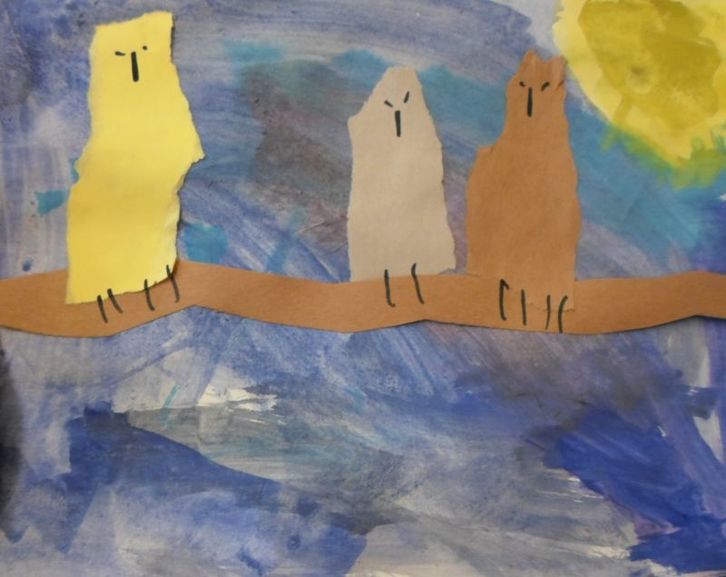
Paint the background in layered watercolor working left to right. Let dry.
Tear the edges of the rectangles to create a fuzzy look for the owlets. They haven't grown in their adult feathers.
Tear the brown paper to create a branch for the owlets to perch on. Glue to the background.
Arrange the owlets on the branch close together. Glue in place.
Add the periods for eyes and the commas for beaks and talons. Owls have two talons facing forward on each foot. (A marker also works well to create the owl features.)
Read the book Owl Babies and substitute the triplet owlet names for the owl names in the story.
Optional: substitute the names of children you know
MATERIALS:
- 8 1/2 x 11 white paper for background
- Watercolors and brushes. Choose day colors: green, blue and yellow or evening colors: orange, yellow, black
- Optional: use a patterned scrapbook paper
- 3 pieces of 3x5" rectangles
- Brown construction paper for branch or a real twig
- 6 brown periods (for eyes) and 15 commas (for beaks and talons) from an alphabet set
- Optional: use a black marker to draw eyes, beaks, and talons
Paint the background in layered watercolor working left to right. Let dry.
Tear the edges of the rectangles to create a fuzzy look for the owlets. They haven't grown in their adult feathers.
Tear the brown paper to create a branch for the owlets to perch on. Glue to the background.
Arrange the owlets on the branch close together. Glue in place.
Add the periods for eyes and the commas for beaks and talons. Owls have two talons facing forward on each foot. (A marker also works well to create the owl features.)
Owl Necklace
Pandora, Patrick and Patience were fitted with transmitters to track their flight patterns. With this necklace you will always know where your owl is.
MATERIALS:
Cut out the 4½ inch circle from a cereal box.
Trace the circle and oval on the reverse side of the pattern paper and cut out.
Glue the oval the wide way in the lower half of the cereal box circle.
Cut the 3½ circle in half to be the wings. Glue them to the side of the cardboard in a resting or flying position. We accordion folded the wings to give them depth.
Add the water lids for eyes, top side down and glue. Place the buttons inside the water lids and glue. You may center them if wish or give your owl a WILD look.
If using brads/paper fasteners, drill a hole in the plastic lids and use the brad to attach the lids to the circle body.
Cut the orange paper in a triangle for a flat beak or a rhombus shape for a dimensional beak. Glue it down.
Use the fun fur in strips to add “feathers” to the tips of the wings or on the body of the owl.
Punch a hole in the top of your circle. Fold the necklace length in half and thread through the hole. Take the loose ends and thread them through the loop, pull tight. You now have a slip knot that will allow your necklace to lay flat. Tie the loose ends togther to complete the necklace.
Consider adding more owls of different size circles to your necklace or perhaps make a banner of owls!
MATERIALS:
- 4 1/2” circle cut from a cereal box
- 2 water bottle lids
- 2 buttons (optional: 2 brads/paper fasteners, large heads)
- 2 x 2¾” oval and one 3½" circle cut from pattern paper. We used a chevron pattern to mimic feathers.
- Scraps of orange paper for a beak
- Fun fur yarn
- One length of string, yarn or ribbon about 12’ long or long enough to get over the head comfortably. (Always use caution with small children and necklaces to avoid choking.)
- Scissors
- Paper punch
Cut out the 4½ inch circle from a cereal box.
Trace the circle and oval on the reverse side of the pattern paper and cut out.
Glue the oval the wide way in the lower half of the cereal box circle.
Cut the 3½ circle in half to be the wings. Glue them to the side of the cardboard in a resting or flying position. We accordion folded the wings to give them depth.
Add the water lids for eyes, top side down and glue. Place the buttons inside the water lids and glue. You may center them if wish or give your owl a WILD look.
If using brads/paper fasteners, drill a hole in the plastic lids and use the brad to attach the lids to the circle body.
Cut the orange paper in a triangle for a flat beak or a rhombus shape for a dimensional beak. Glue it down.
Use the fun fur in strips to add “feathers” to the tips of the wings or on the body of the owl.
Punch a hole in the top of your circle. Fold the necklace length in half and thread through the hole. Take the loose ends and thread them through the loop, pull tight. You now have a slip knot that will allow your necklace to lay flat. Tie the loose ends togther to complete the necklace.
Consider adding more owls of different size circles to your necklace or perhaps make a banner of owls!
